レーザーマーキングマシン
コスモレーザー - 様々な産業向けのプロフェッショナルレーザー加工機メーカー
言語
コスモレーザー - 様々な産業向けのプロフェッショナルレーザー加工機メーカー
卓上型ファイバーレーザーマーキング・彫刻機Sparrow20のキャッチフレーズは「ミニサイズ、ビッグ機能」。当社の卓上レーザーマーカーは、レーザーを使用して金属、プラスチック、ガラス、木材などのさまざまな材料にマーキングまたは彫刻する装置の一種です。この機械は高出力のレーザー ビームを放射し、材料の表面を正確なパターンでエッチングし、永久的なマークやデザインを作成します。
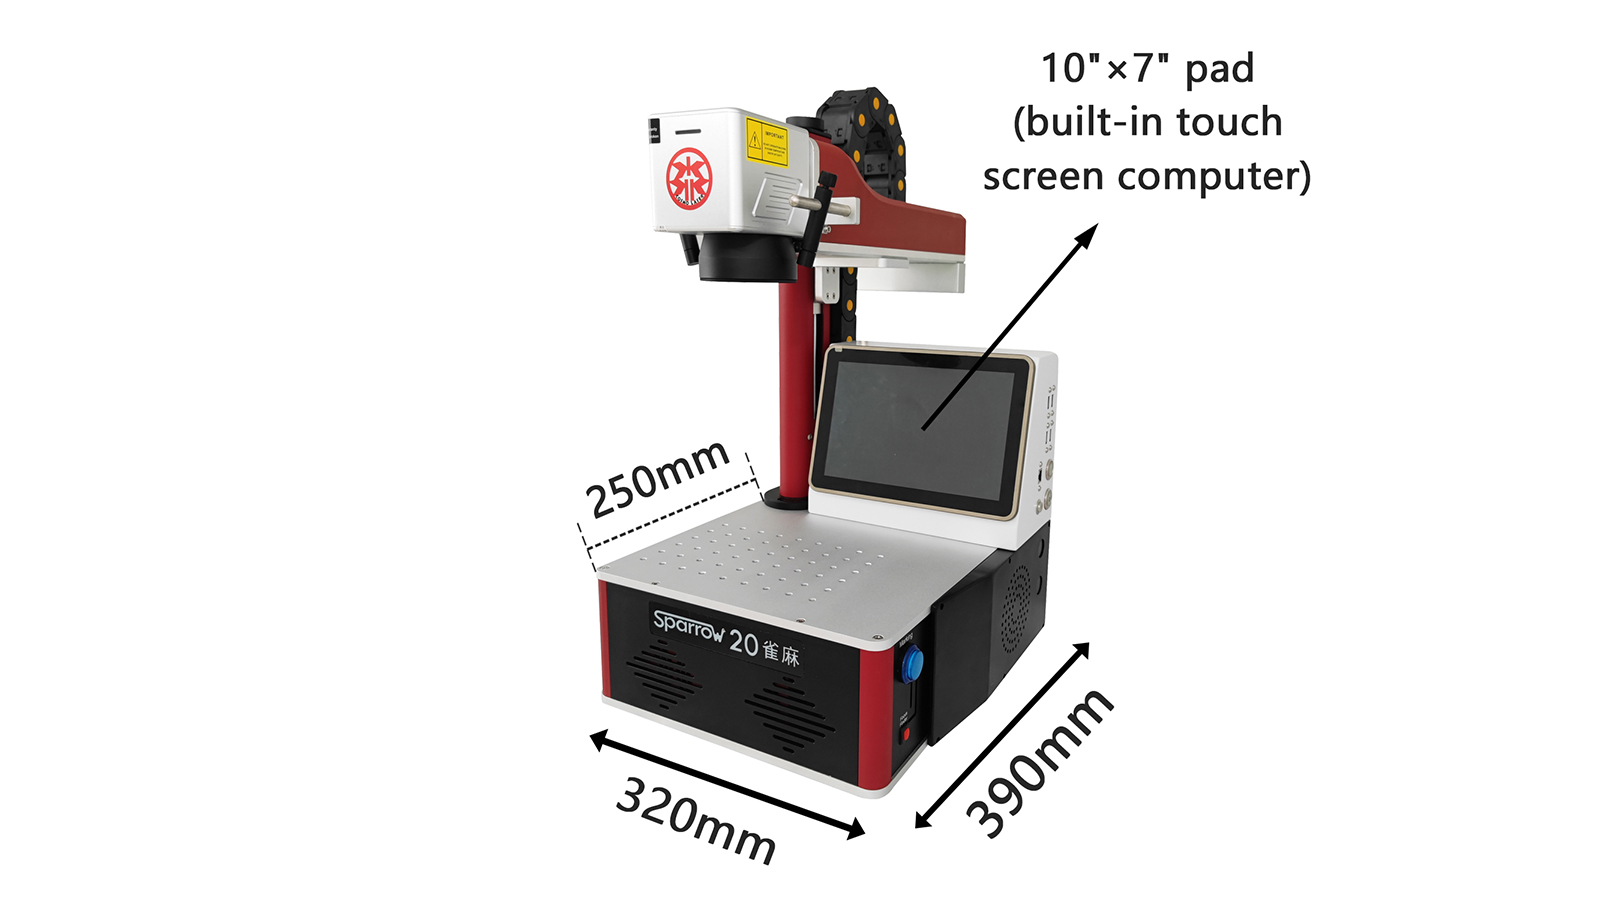
このマシンには10インチ×7インチのタッチスクリーンコンピュータが内蔵されています
(キーボードとマウスでも制御可能)
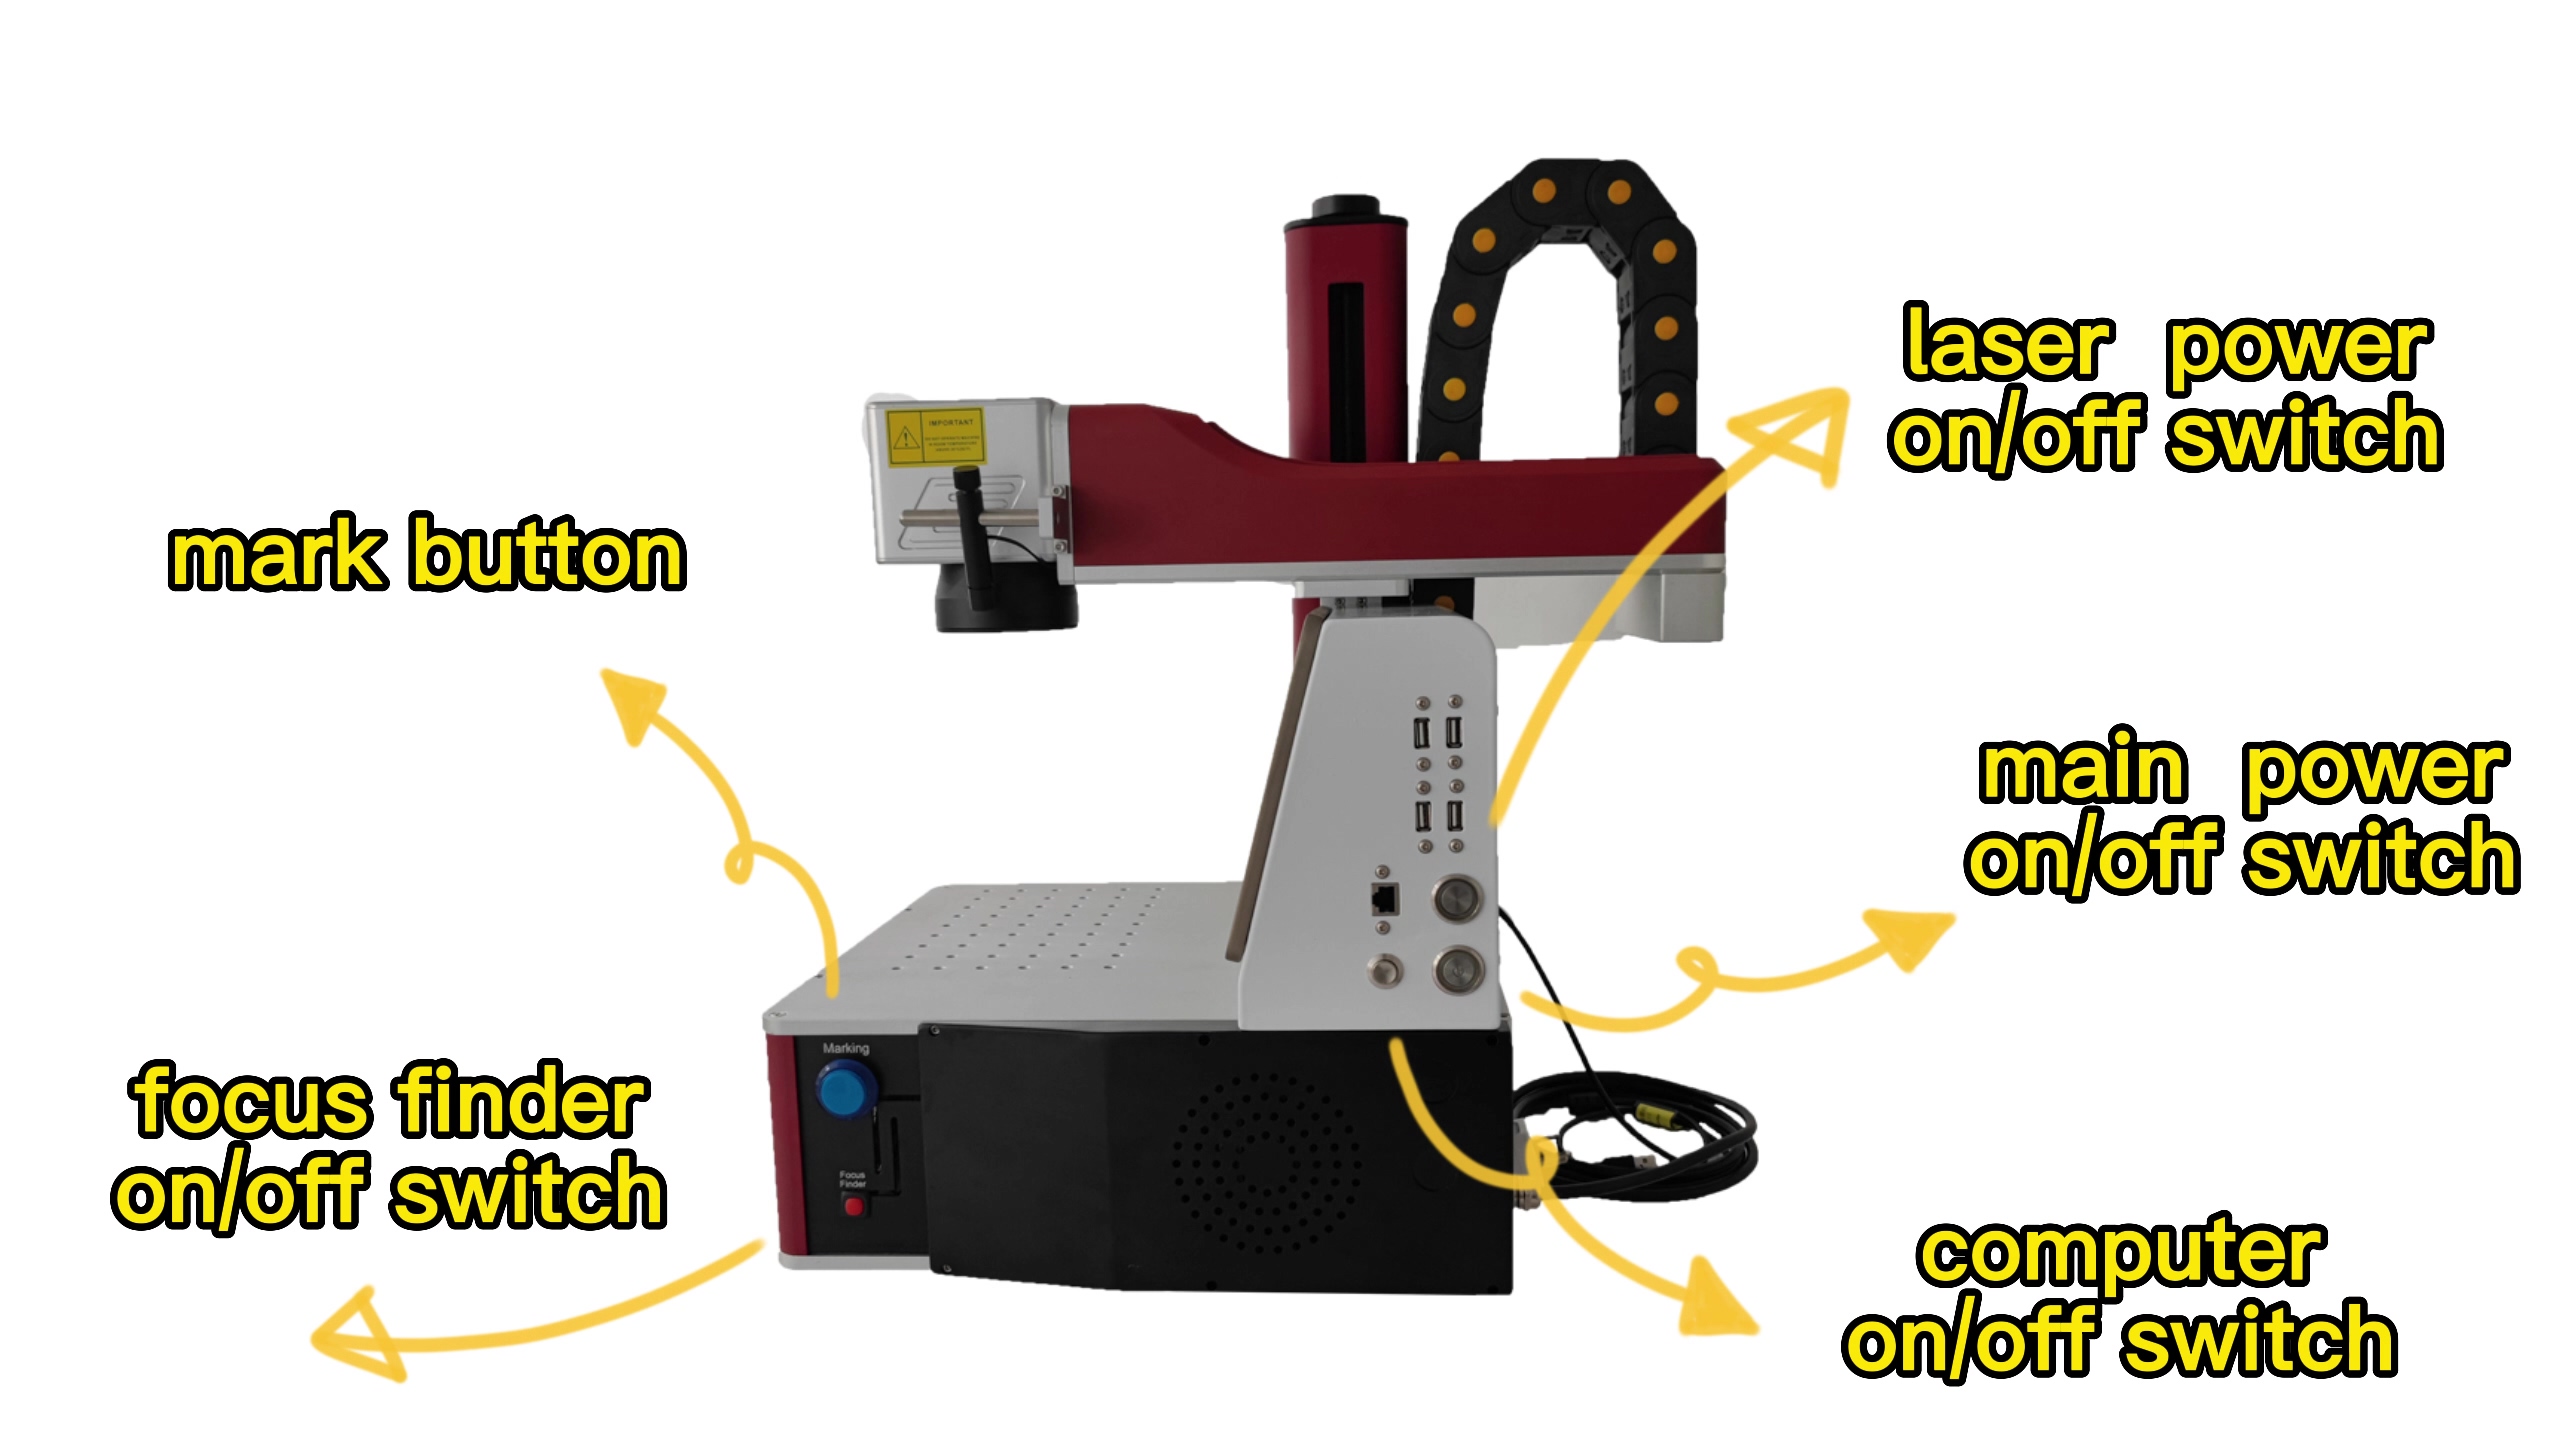
マシンパーツ: 1) マークボタン
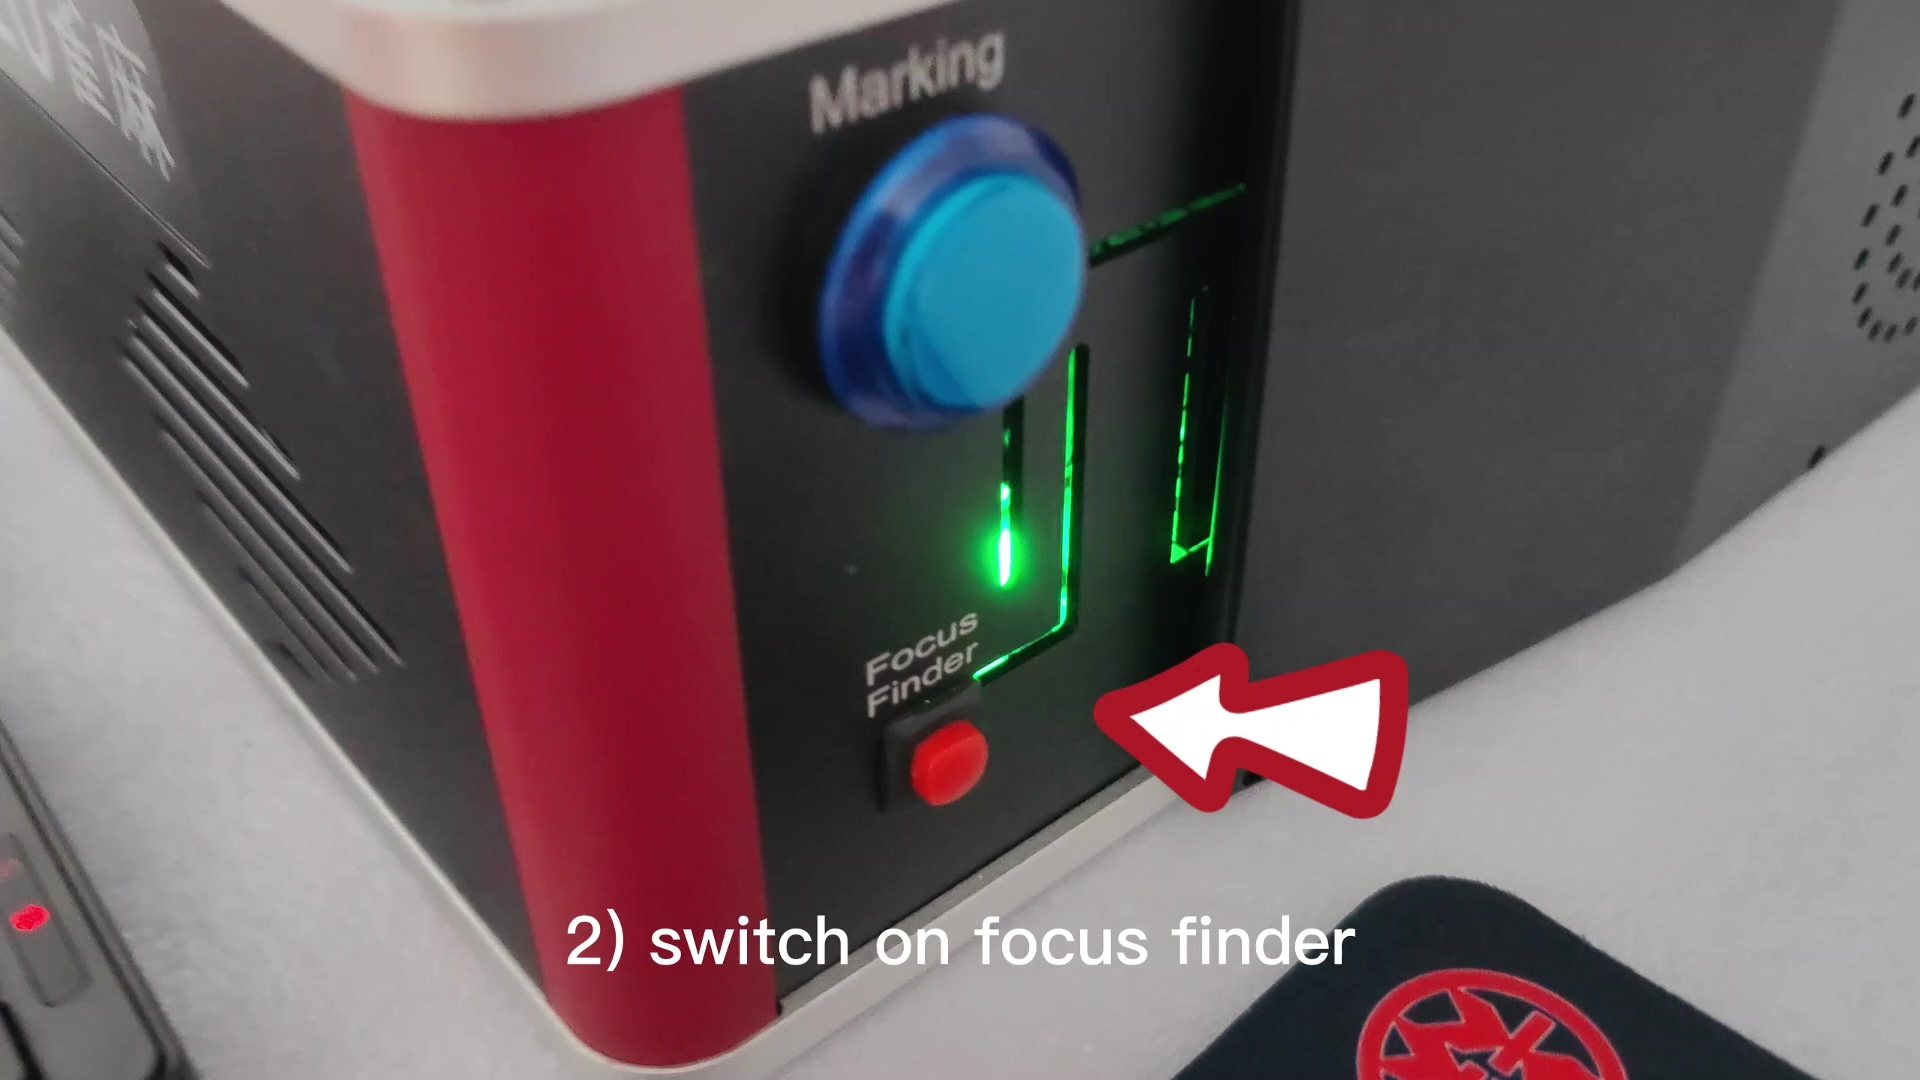
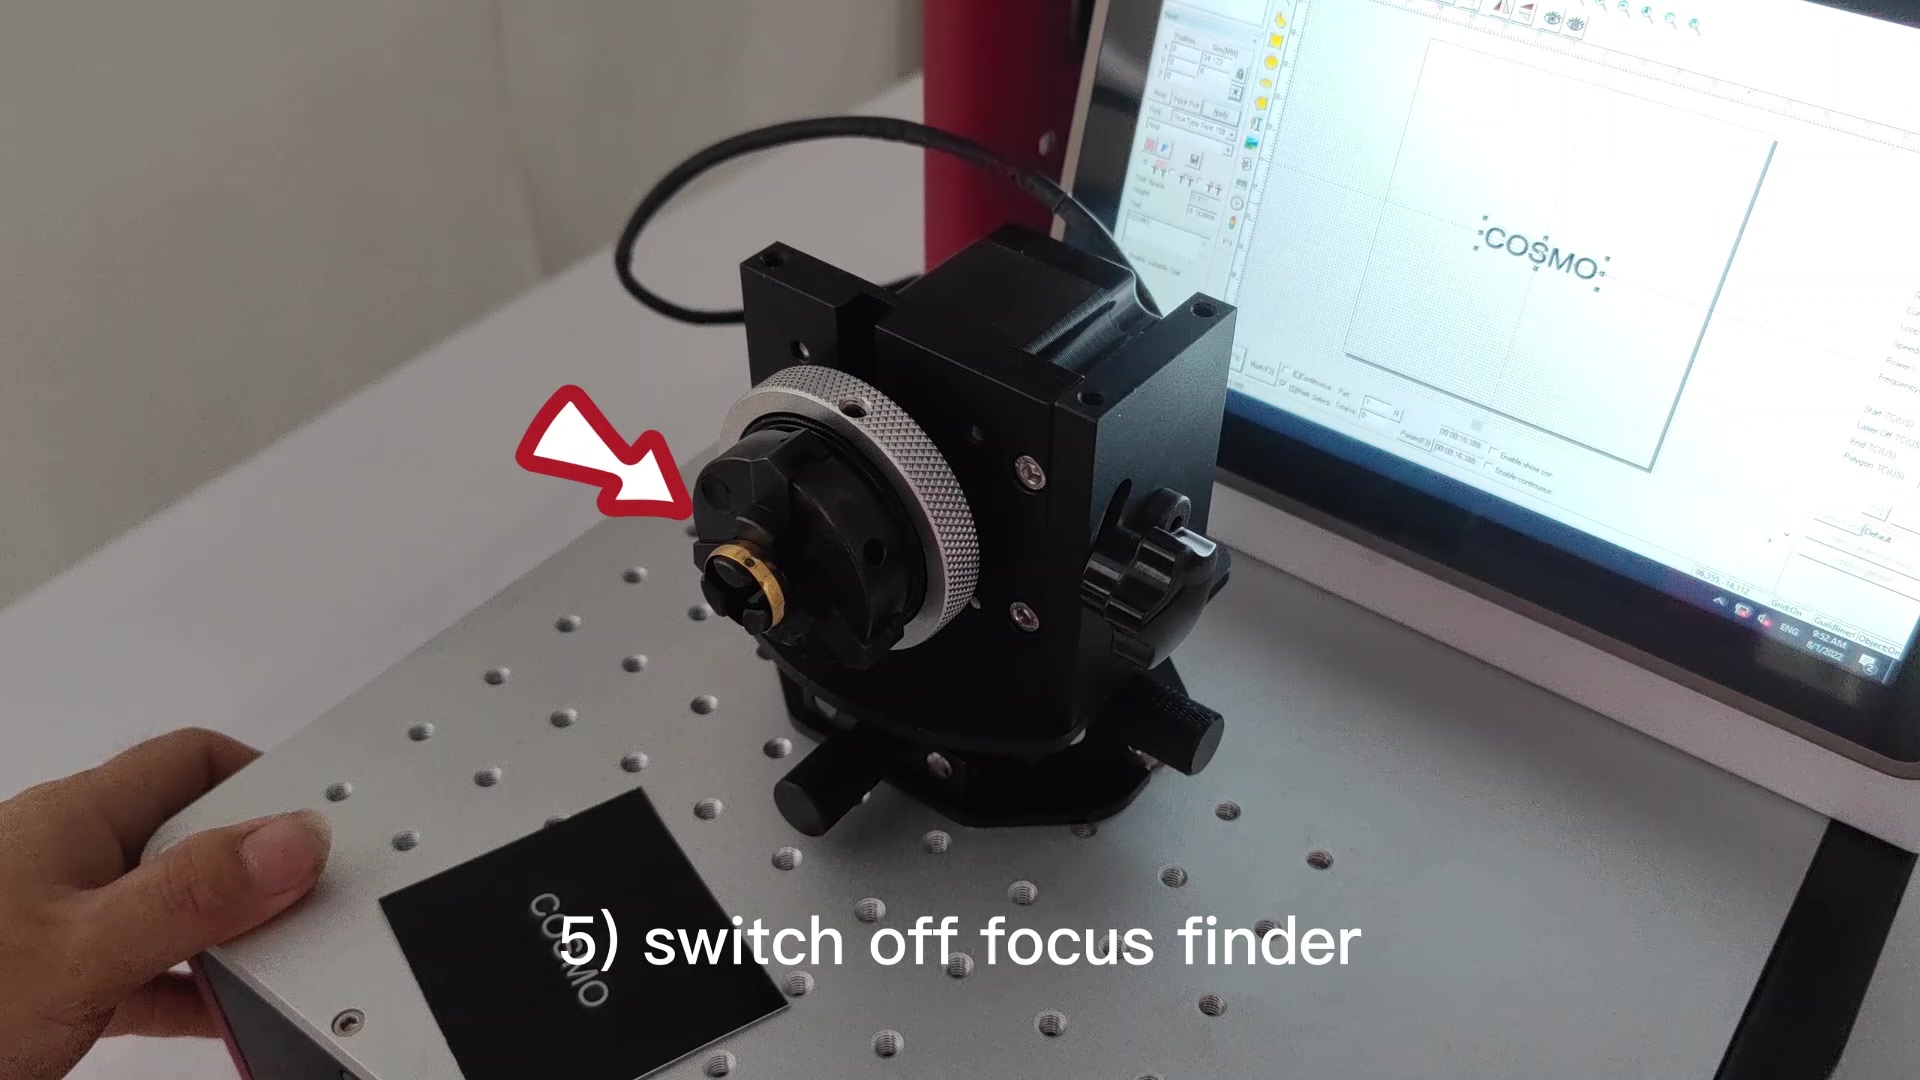
2) フォーカスファインダーオン/オフスイッチ
3) レーザー電源オン/オフ スイッチ
4) 主電源オン/オフスイッチ
5) コンピュータのオン/オフスイッチ
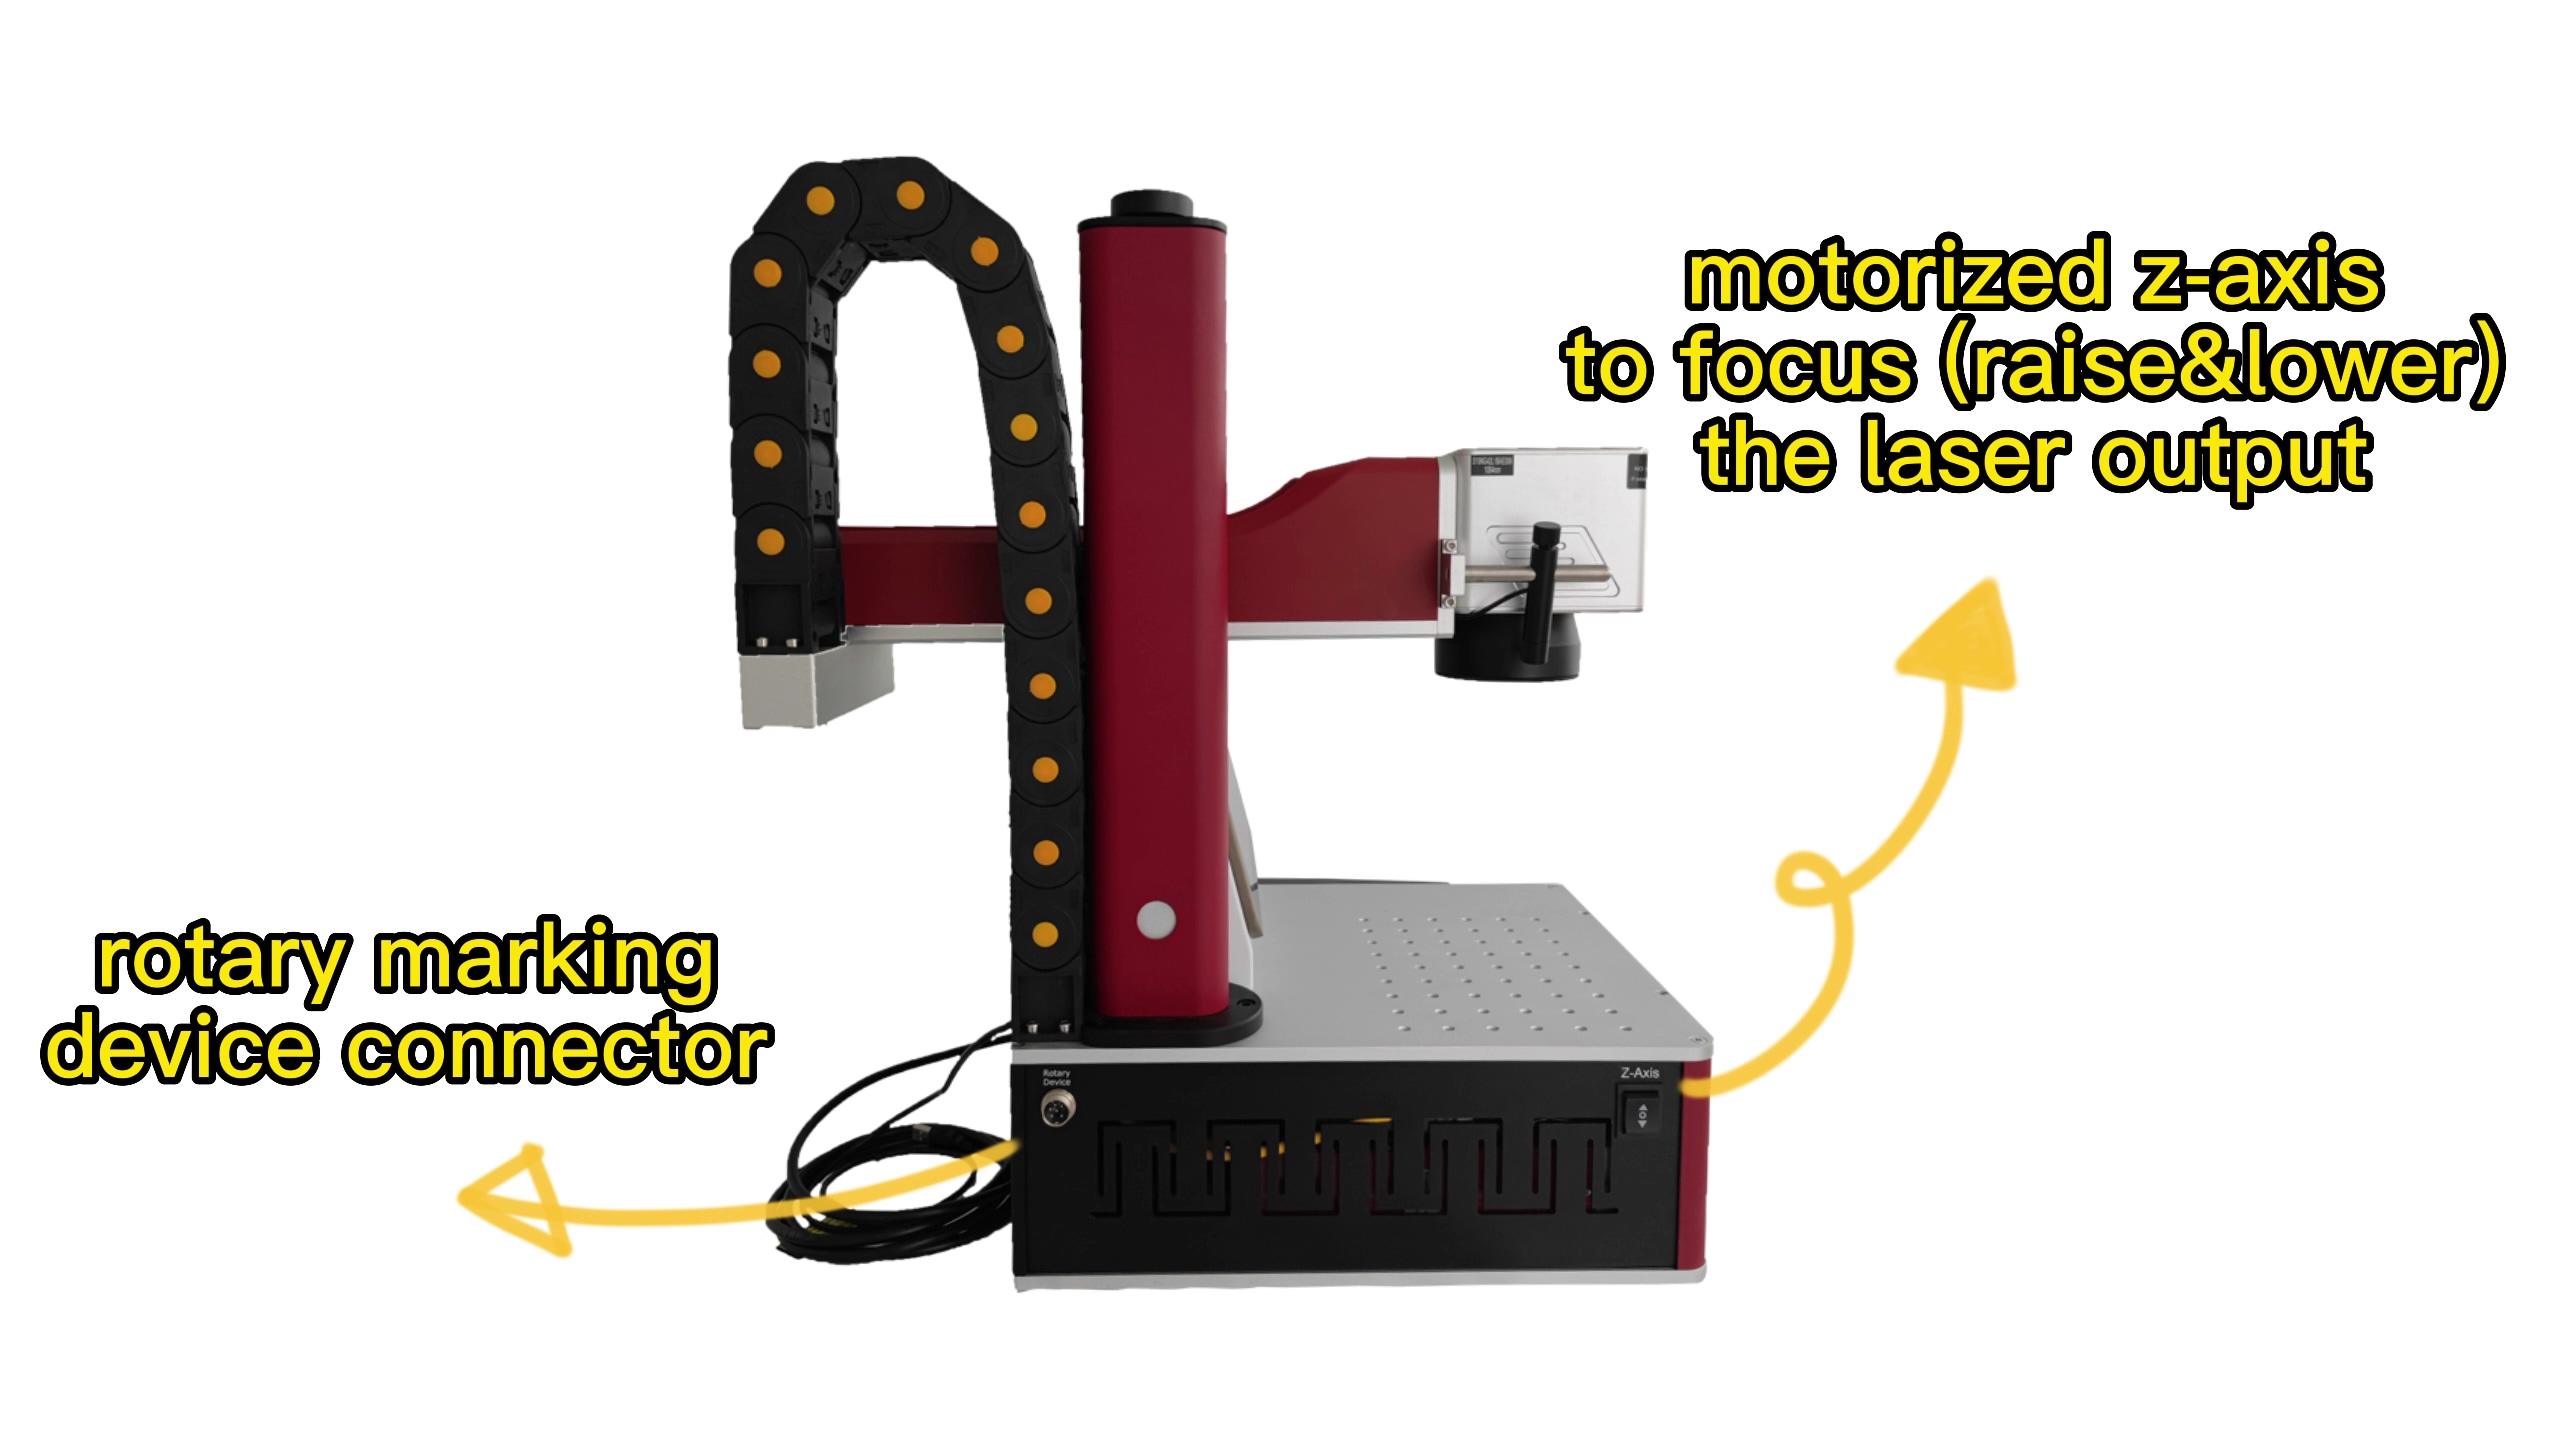
機械部品: 1) ロータリーマーキングデバイスコネクタ
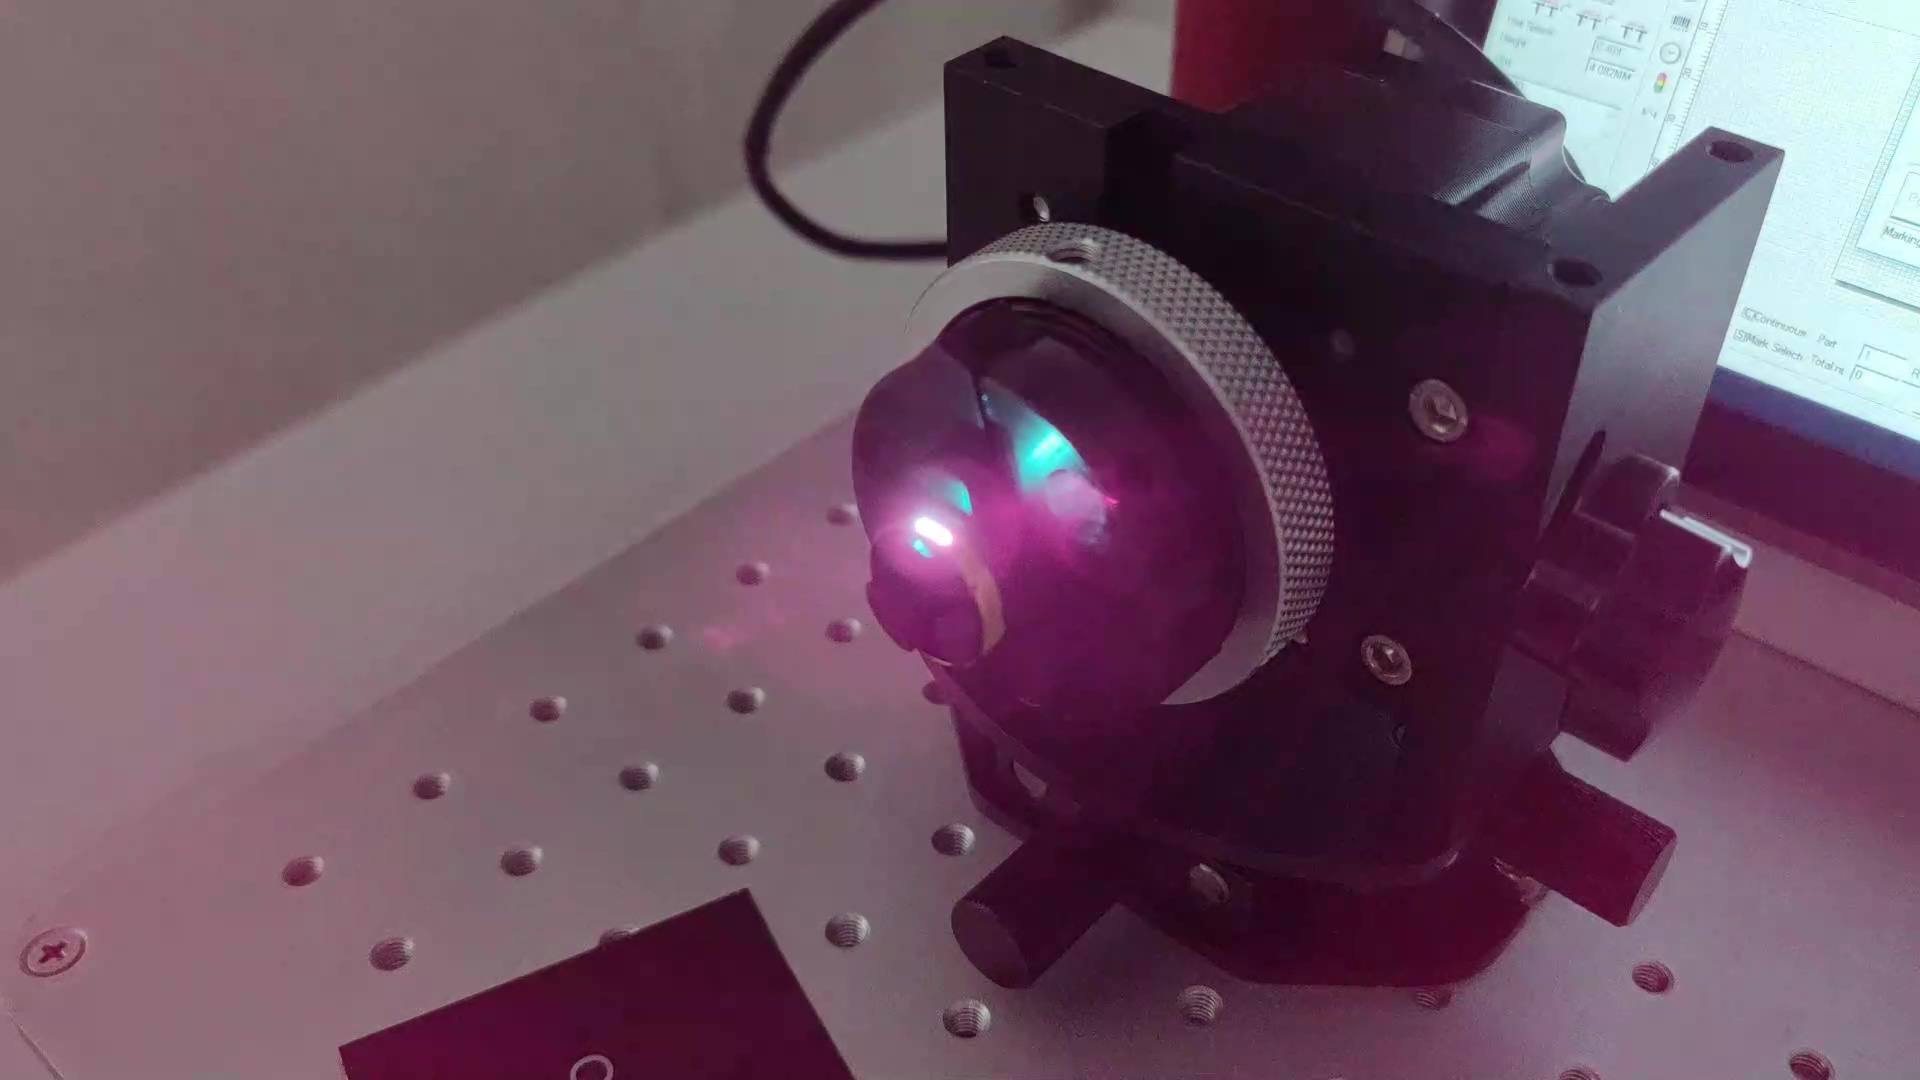
2) 電動 Z 軸でフォーカス (上昇)&下)レーザー出力

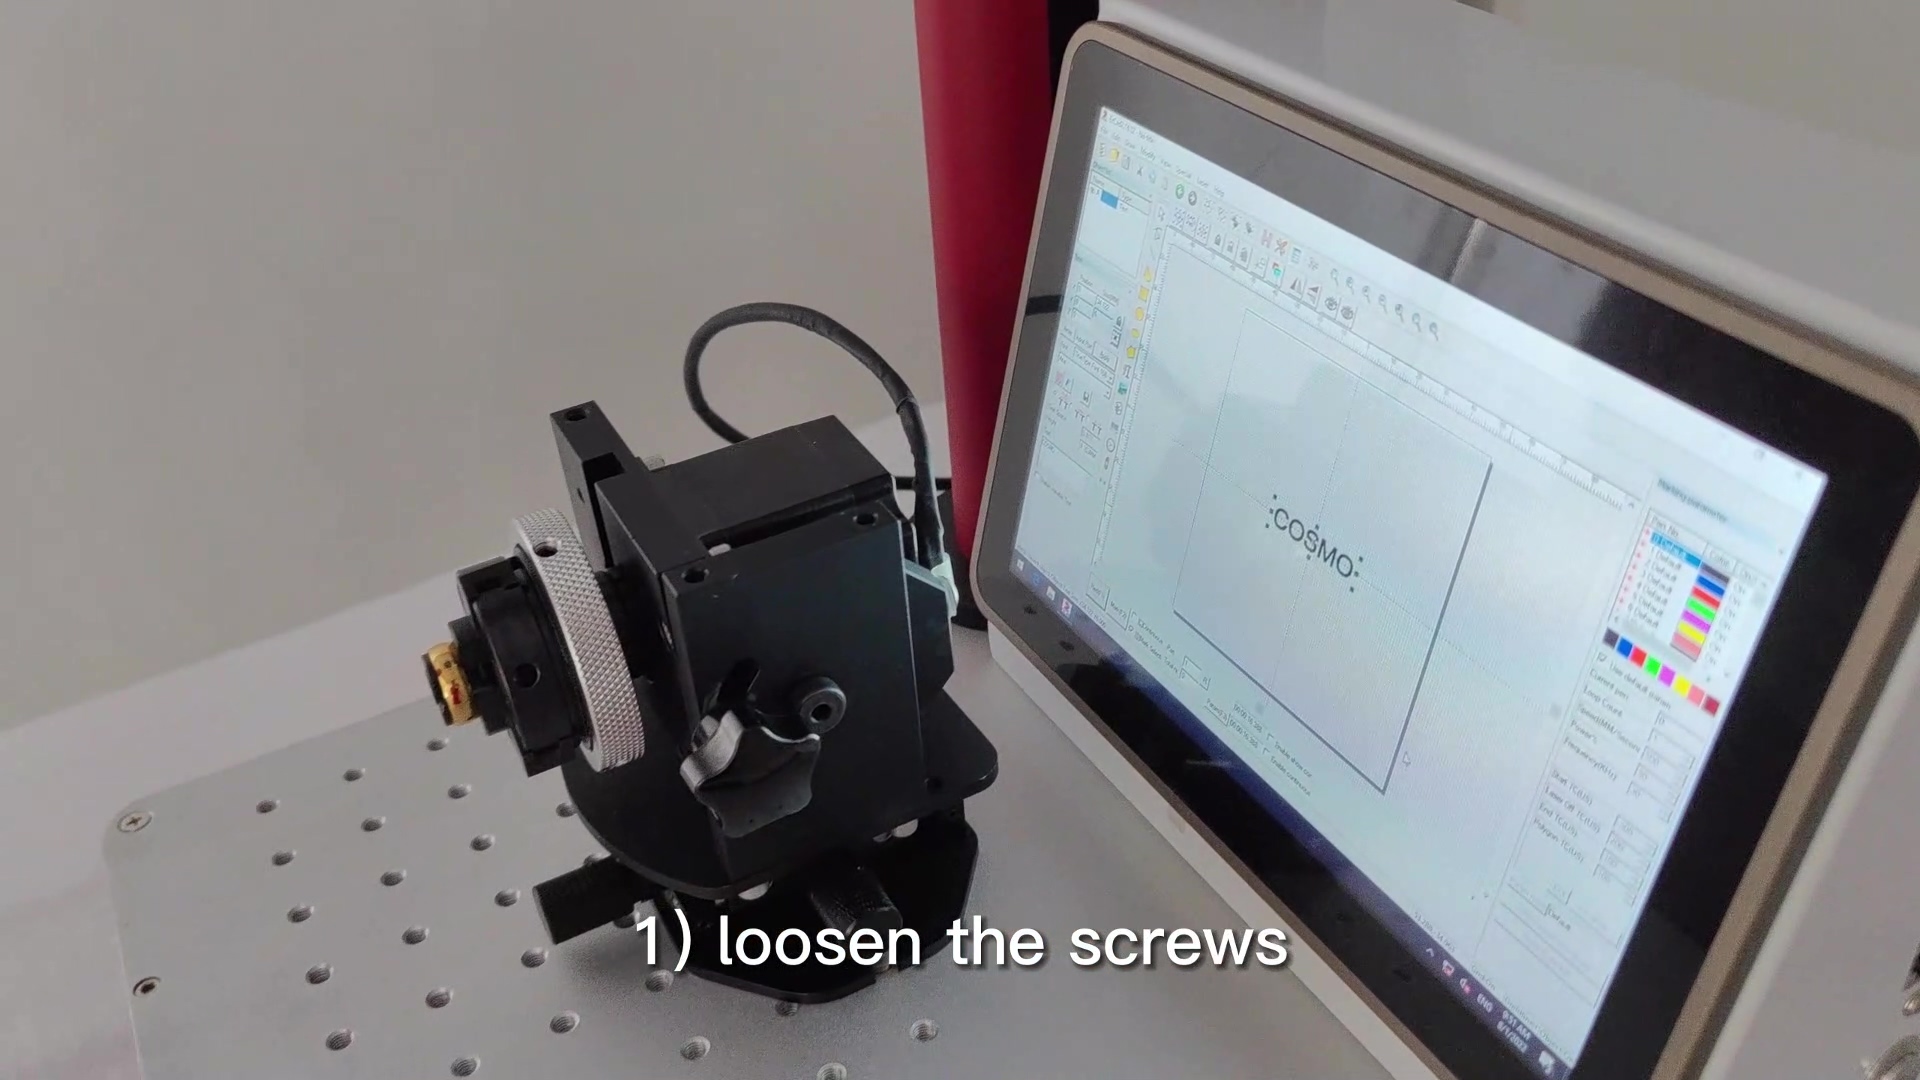
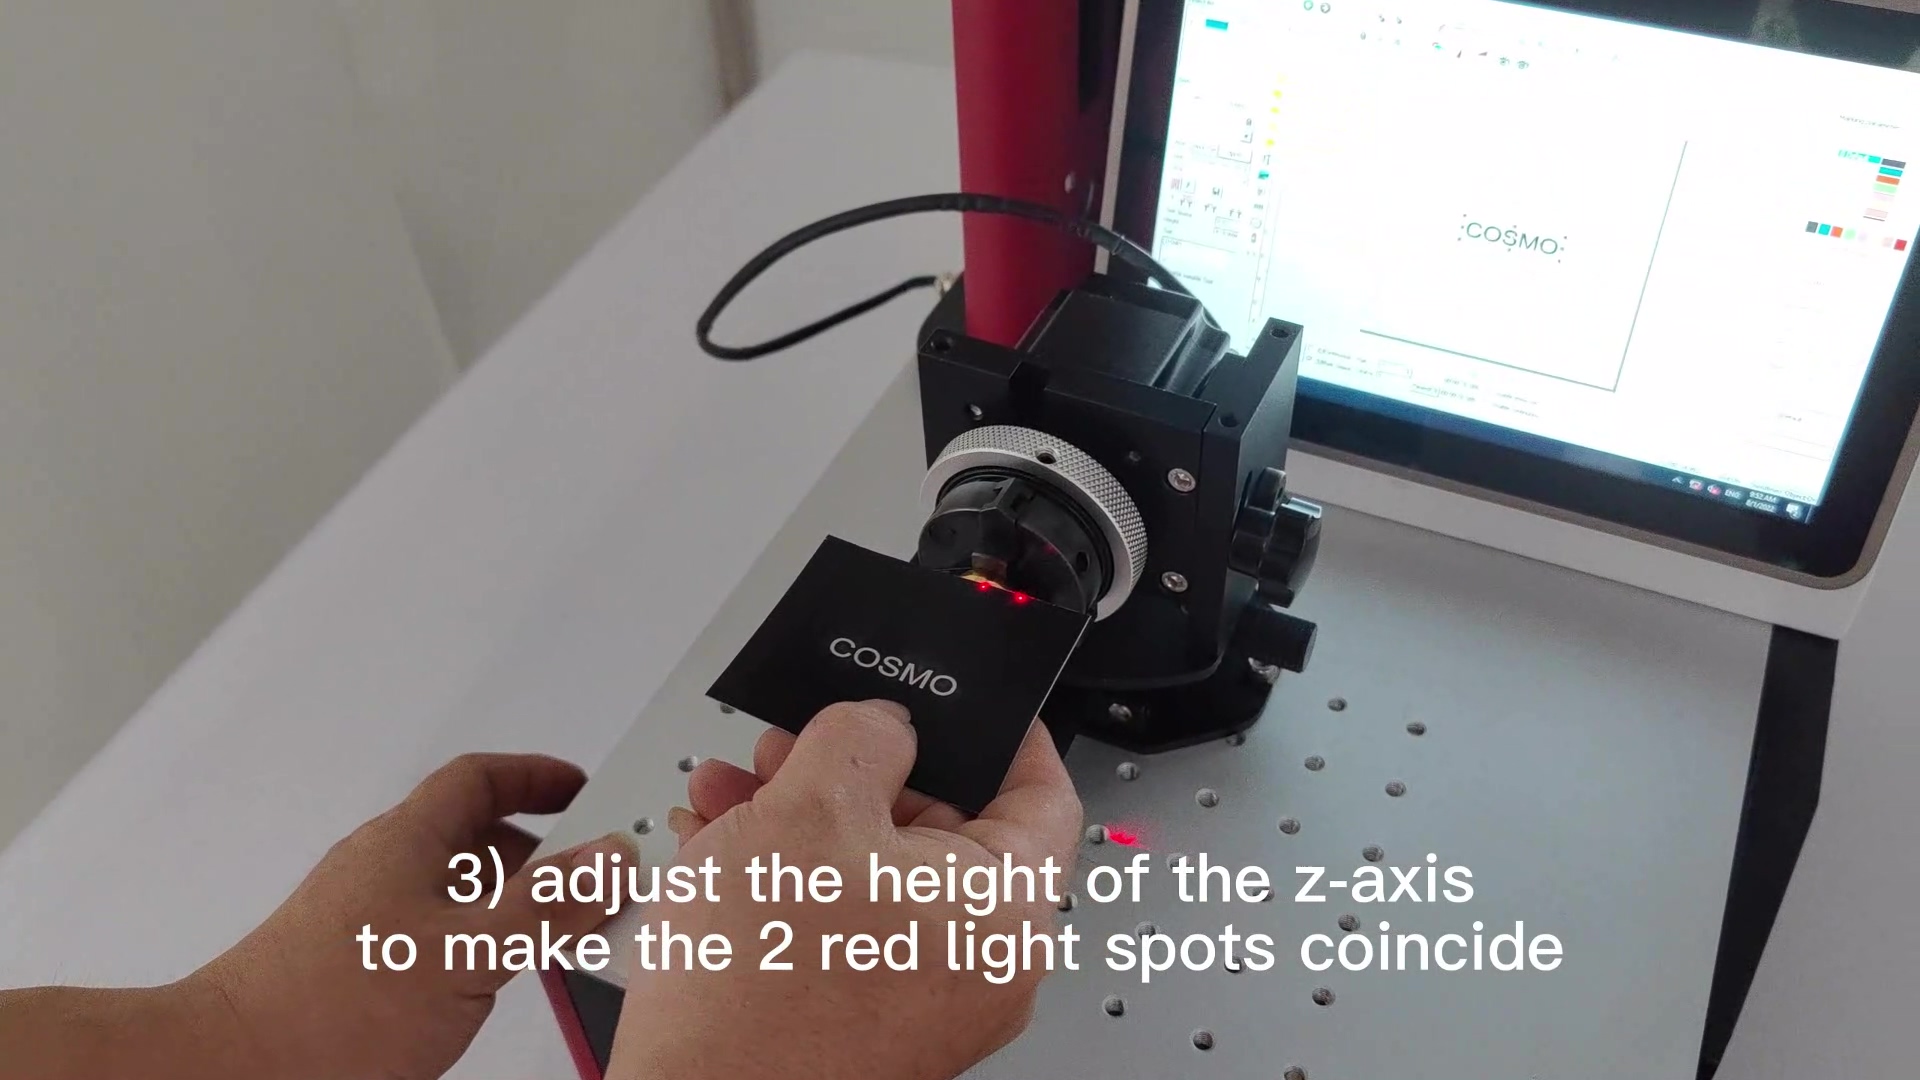
3) 2 つの赤い光点が一致するように Z 軸の高さを調整します。

4) 下の X、Y ワークベンチを調整して、リングの中心に赤いライト ポイントを作成します。


お問い合わせ
お問い合わせ
お問い合わせフォームにメールアドレスまたは電話番号を残していただければ、さらに多くのサービスを提供できます。


